What is the illuminance that you obtain from evalglare?
Did you try modifying the exposure of the HDR image when you are displaying it?
If you are using ximage to do that, you can do that by specifying a -e value.
In case that does not solve it, can you also share the final hdr image that you get, please?
Hi @Clotilde_Pierson,
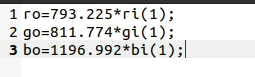
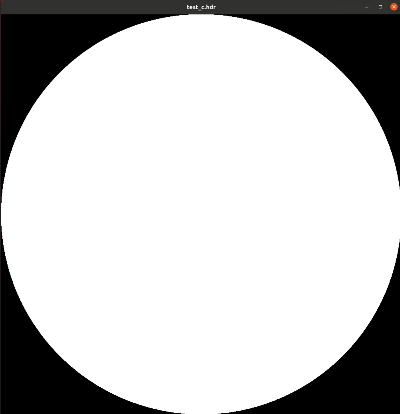
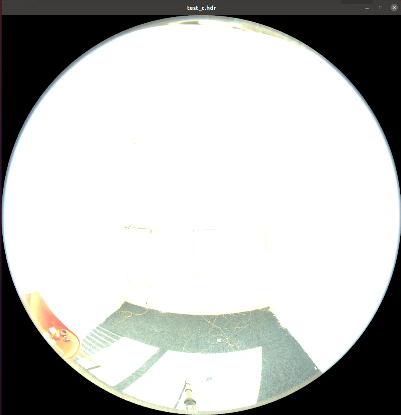
The image test_bcr.hdr in the script that I showed is cropped in advance by Photoshop from the original image test.hdr. And test.hdr is generated from the script raw2hdr. The illuminance from evaglare is 68396 lux which is much higher than the measured value 8838 lux. The final image test_c.hdr that is all white is displayed with ximage without modifying the exposure of the HDR image like this:
ximage test_c.hdr
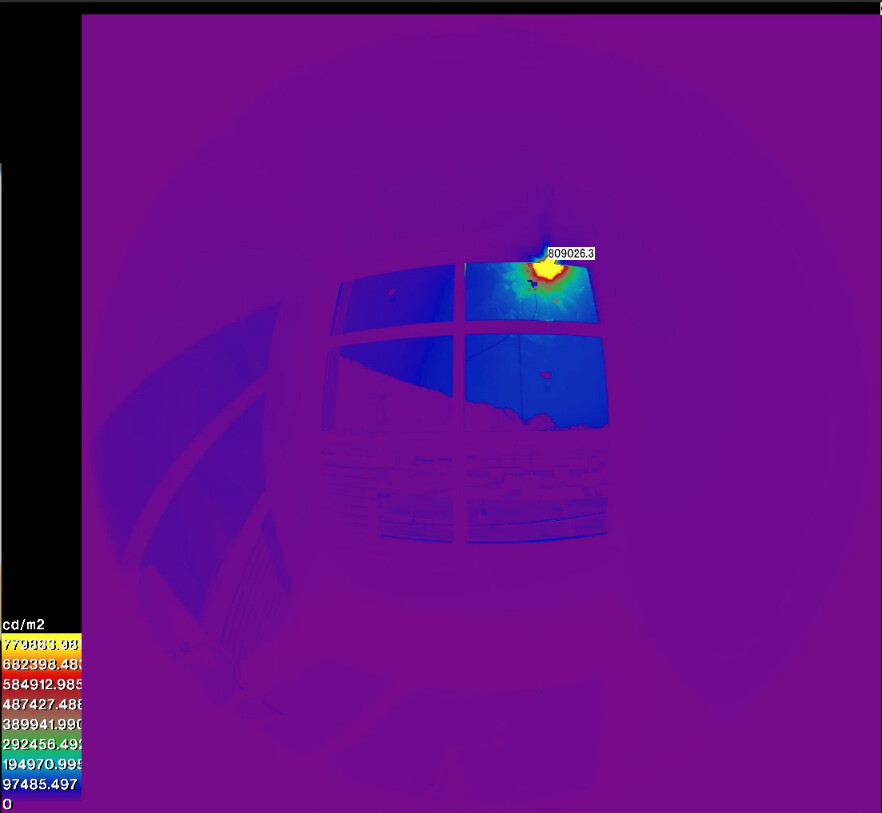
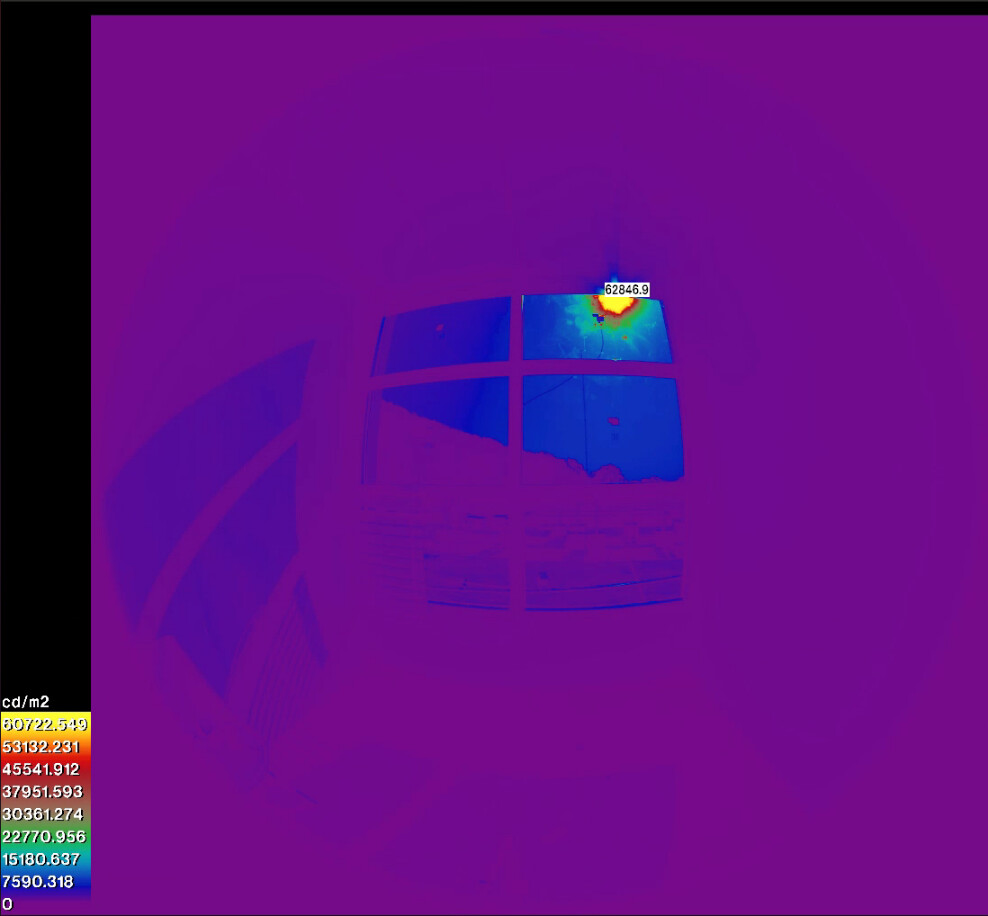
And the corresponding falsecolor image is as follows:
And the vertical illuminance is 5304 lux and the final image test_c.hdr which is not all white like the former one:
As for the falsecolor image, the peak luminance is smaller than the former one:
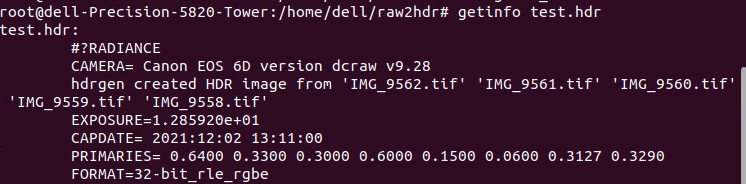
When you crop your image in Photoshop, you lose the exposure value (just check the getinfo of test.hdr versus that of test_bcr.hdr), unless you had included this exposure in your pixel values by applying ra_xyze (as Jan explained in the other post you refer to and as is explained in the tutorial). By losing the exposure value, you somehow lose the “absolute scale” of the pixel values, and that explains why you obtain a very large illuminance and a white picture.
Therefore, I would suggest following exactly what is written in the HDR tutorial (first ra_xyze on your merged HDR image (not on the one cropped in Photoshop), then pcompos to crop the image and pcomb to apply the corrections including the ND filter correction).
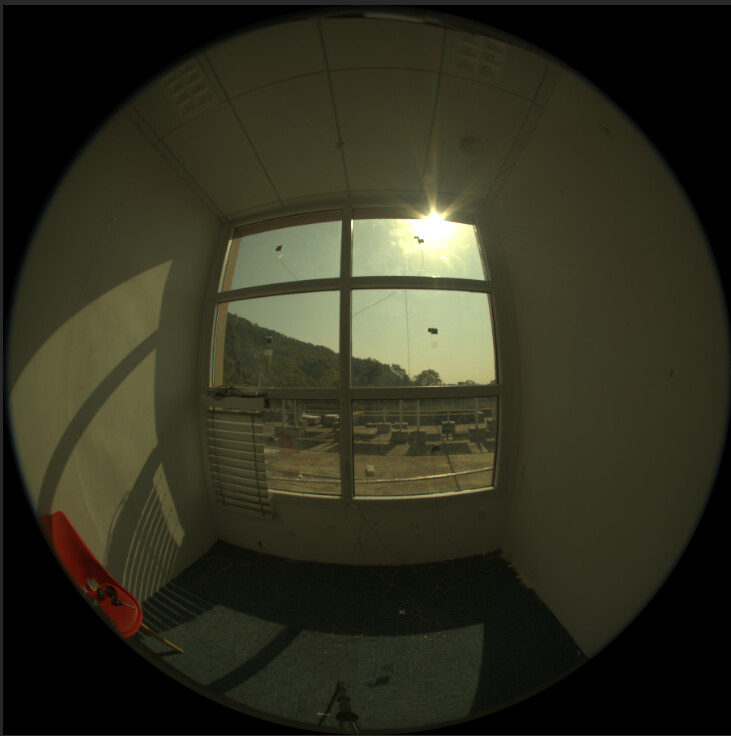
Another attention point would be the location of your luxmeter. As the sun is at the edge of the window, a small displacement between the position of the camera and that of the luxmeter might create a large deviation in vertical illuminance between the two (if a large part of the sun is included in the image taken by your camera than what is covered in the field of view of your sensor).
As for this problem, if the sun is in the center of the view of the camera and the part of the sun is not so large, the devitation of vertical illuminance would be smaller?
For the exposure, as you can see, in the original image it is 12.8592, whereas in the Photoshop-cropped image, it disappeared (hence is considered to be equal to 1). That’s causing the difference between the correctly processed image at 5304lux and the badly-processed one at 68396lux.
For the second issue, it’s not so much a question of where it is placed in the FOV of the camera, it is more about making sure that the luxmeter and the camera have the same FOV. Since your sun produces a very high luminance, having the same area of the sun in the FOV of the luxmeter and of the camera is important. Hence, you need to pay attention how you place both equipments (e.g. if you would place your luxmeter below the camera lens in this scene, I expect your luxmeter would have a slightly larger area of the sun in its FOV, hence would give a higher illuminance).
Hi @Clotilde_Pierson,
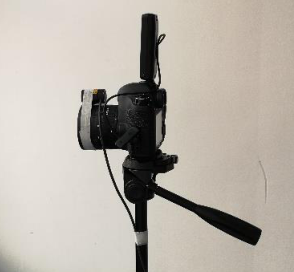
The luxmeter is placed on the top of the lens like this and how about this way?
As for this issue, it seems impossible to make the luxmeter and the camera have the same FOV. Is it better when the luxmeter is next to the lens at the same height? What is the suitable way to handle the position relationship between the lens and luxmeter?