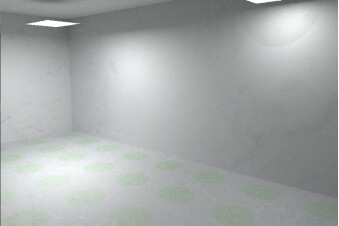
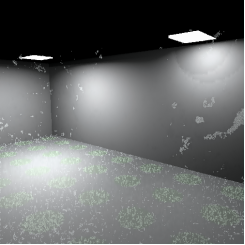
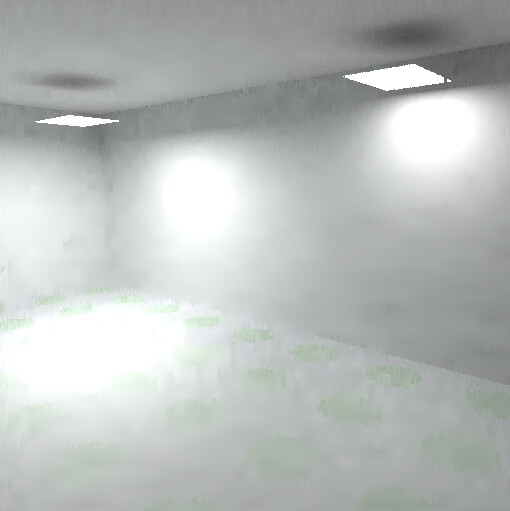
I am trying to render a scene however while the review image that I get with the rvu command looks fine my rendered .hdr image with rpict seems kind of bad quality. For example with the following command:
What is the reason that the quality in the two images is so different. I would expect to get a rendered .hdr image similar to what the preview is showing.
The defaults for rvu are not the same as rpict, so any settings you do not set may be different (you can check this with rvu -defaults and rpict -defaults
At least as you have shared then here, your parameters do not match, among the most relevant are -lw (.0001 vs. .1) and -dt (rvu_default:.05 vs. 0.5). In both cases the rpict settings are far to high (meaning low quality) to generate reliable results, and I suspect at least one of these is at the root of your different artifact and under-sampling problems. (You also have differences with -vv -lr -dc)
I will channel Greg here and recommend that you use the rad program to help set the necessary parameters (see: man rad) for a complete description. rad also has a multiprocessing -n option which should help speed things up (I notice you are using -n with rvu).
Thanks for the reply. Well I know that some of the parameters are quite different but to be honest I didn’t think that they would make that much of a difference (apparently I was wrong).
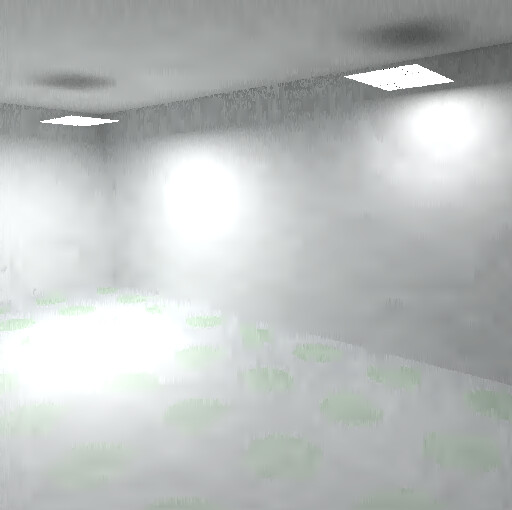
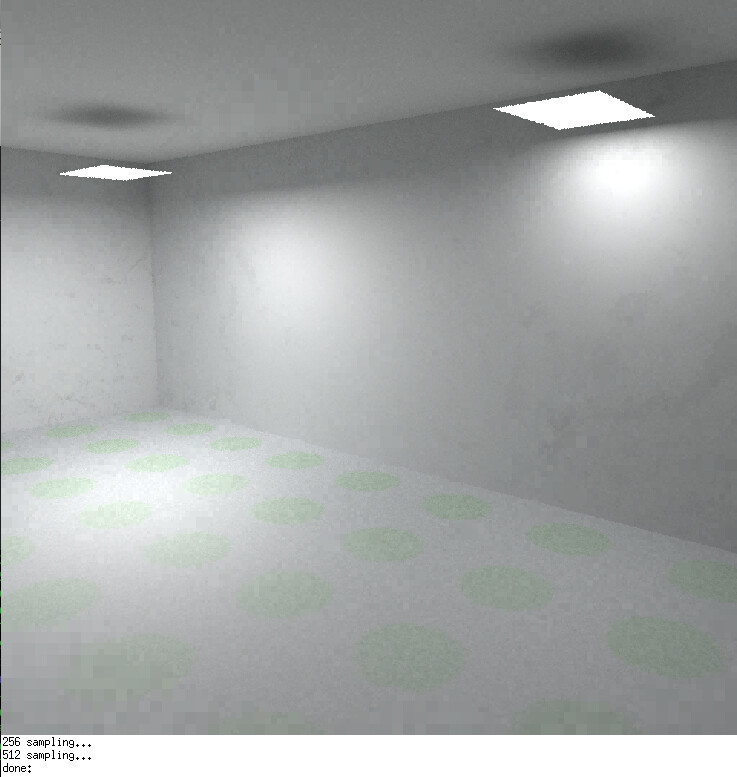
To be honest these are the default values that I was getting by using the ViSuite addon in blender (which uses radiance under the hood). Also initially it uses rpiece in order to split the rendering in pieces. However, since I was not getting the result of the rvu command I am trying to decrypt which parameters make the actual difference so that I can adjust them accordingly. I modified the -lw and -dt which you correctly spotted that they were different as well as the other params but the best I could get is the following rendering:
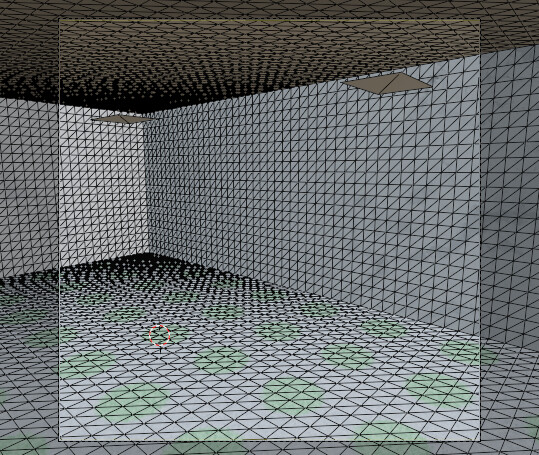
I am puzzled by the black spots visible in the middle of the light sources. How are these modeled? If they are triangles, this could be a big part of your problem.
Yes, Radiance is not optimized to handle non-rectangular light sources, and right-triangles are particularly problematic. If you replace your paired right-triangles with a single rectangle for each emitter, you might get a very different result. (This is only important for the light sources, not the other surfaces.)
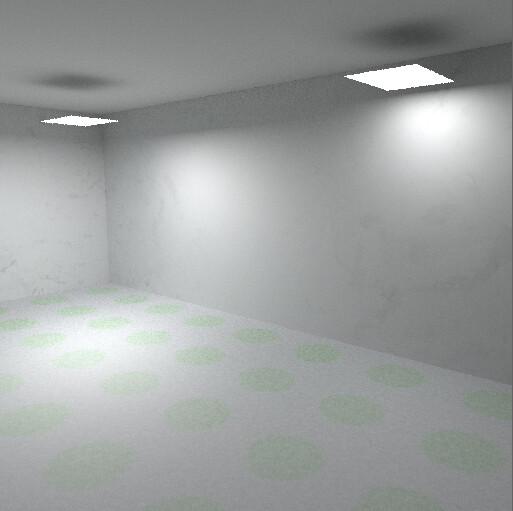
What I do not get is why the result of rpict differs from the one of rvu if the problem was the triangles then the same issue should be showing in the in the output of rvu, shouldn’t it? Which as you can see it isn’t:
I don’t think the -ps parameter works the same with with rvu and rpict (I actually am not sure it does anything, @Greg_Ward?). try running rpict with -ps 1, 16 is a very high value (it means that initially only 1 out of every 256 pixels are sampled, and intermediate samples are only taken if the difference is less than -pt). If you care about artifacts, and especially with -aa 0, a -ps value greater than 1 should only be used if you are also going to filter the image by the same amount (ie pairing -ps 3 with pfilt -x /3 -y /3)
The light source reflections on the wall and on the floor seem a bit of saturated though, any idea for that?
Update:
Actually, I am not sure but I think it might be related with the tone mapping and how the image is shown from the corresponding software each time. I am saying that because if I transform the above .hdr image (where supposedly I have saturation on the parts where the light is directly reflected from the light sources) by using ra_bmp then the result is the one bellow which is perfect:
Glad you are liking your results better. The -ps option does work the same for rvu as rpict, and should definitely be set to -ps 1 with -aa 0. I didn’t notice you had it set to 16.
Hhmm interesting, I am puzzled now because if rvu and rpict should work similarly then why in the rvu command while the -ps parameter is set to 16 still the output was much better.
You have very nonsensical parameters set. Your -lw 0.1 setting effectively turns off the indirect calculation in rpict with a -aa 0 setting. You have to at least ensure you have the same settings between rvu and rpict to expect similar results. I don’t think ViSuite is being much help in this regard.