Thanks a lot for all these tips. Very valuable to me.
Actually, just like you mentioned, I converted these light sources
into CG lights to better address GI sampling issue and to have more
flexible control on lighting.
For interior shot, I reconstruct the set as rough geometry via
photogrammetry and project fill-light-only environment map onto these
geometries to capture animated environment maps for ambient lighting.
Then, I cut light sources from the original environment map and set up
area light sources with these cut-out HDR textures based on original
lighting apparatus real-world positions.
I have thought about requesting this kind of feature to be added into
future sIBL sets (for interior shot) for physically-based lighting
setup. But I have no clue how to approach it as it involves much more
preparations than simply separating diffuse and reflection component
of the lighting as well as extracting light sources as traditional CG
point, spot, or directional lights.
Nice technique with the re-projection. Certainly deals with the problem of spacial uniformity. The problem is, as soon as actual geometry gets involved, you're getting somewhat software-specific. Luxology has branched off their modo environment presets from our smart IBL idea, by including scene geometry. We're not planning to do this, we would like to keep everything referenced in image-space for reasons of simplicity and portability. We will, however, include photographic back plates in the near future. As long as they're shot in the vicinity of the main panorama, we can align a backplate using Hugin's image stack, and then use the actual recorded FOV versus the calculated FOV to triangulate a relative matching camera position.
If you're rendering glossy materials, the placement of the lights becomes rather important, and should be adjustable. There was a recent paper on that: http://www.mpi-inf.mpg.de/resources/ReflectionEditing/
Not production-ready yet, though. So far your workflow is what comes closest, and is actually used a lot. The folks at Digital Domain have developed a workflow where they routinely separate the brightest lights on separate pieces of geometry, essentially creating floating textured light polys so they can adjust placements. They use Nuke for that, but it's rather easy in any 3d app.
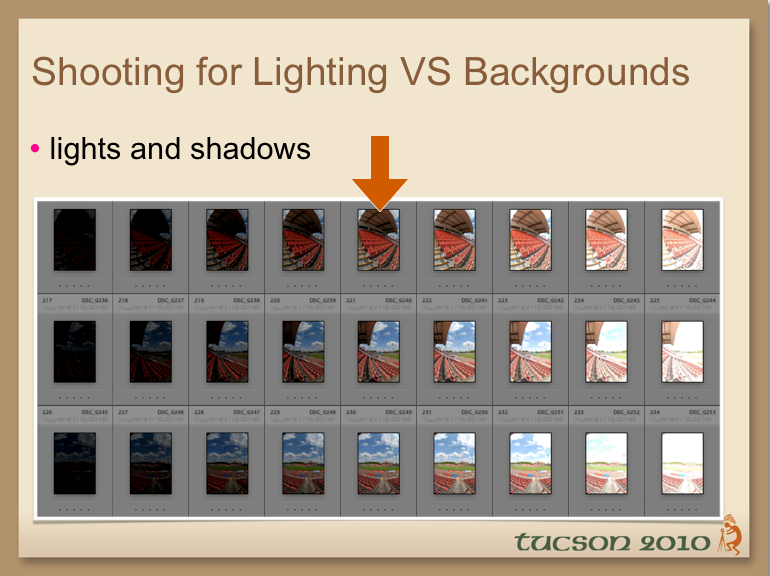
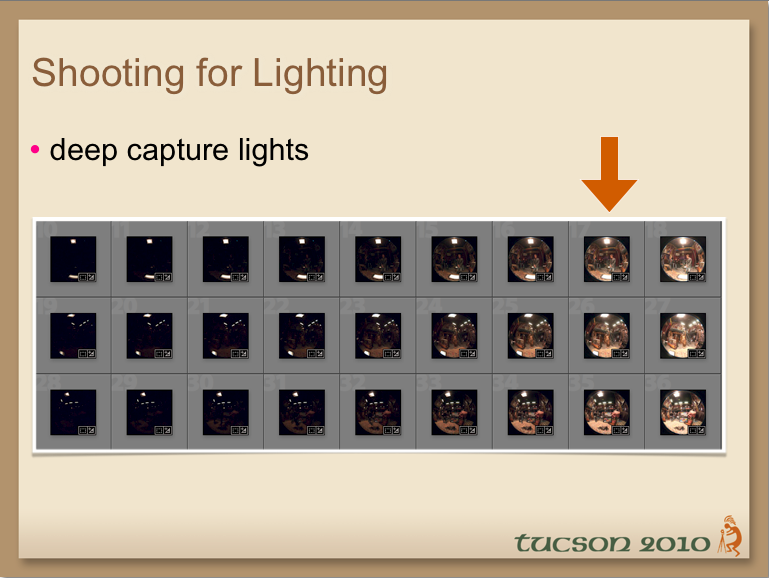
In terms of capturing: Since there is very little time on set, I do still rely on auto-bracketing. Directors and grips get antsy when you fiddle around with a laptop, or when the setup takes more than 10 seconds. So 9er brackets with +- 1 EV is all I can realistically get, anything more would require me to break out the Promote Control, which I try to avoid for reliability reasons. Turns out, if you pick your battle, Nikon's 9 frames are often sufficient when you align the entire sequence to the brightest light source. For lighting purpose, it's totally fine if the "metered middle exposure" ends up on the dark end of the bracketing set. You might miss some of the shadows, but they barely contribute to the lighting anyway. Here are two slides illustrating the different ranges:
Thanks a lot for all these tips. Very valuable to me.
Actually, just like you mentioned, I converted these light sources
into CG lights to better address GI sampling issue and to have more
flexible control on lighting.
For interior shot, I reconstruct the set as rough geometry via
photogrammetry and project fill-light-only environment map onto these
geometries to capture animated environment maps for ambient lighting.
Then, I cut light sources from the original environment map and set up
area light sources with these cut-out HDR textures based on original
lighting apparatus real-world positions.
I have thought about requesting this kind of feature to be added into
future sIBL sets (for interior shot) for physically-based lighting
setup. But I have no clue how to approach it as it involves much more
preparations than simply separating diffuse and reflection component
of the lighting as well as extracting light sources as traditional CG
point, spot, or directional lights.